[dc]C[/dc]an you teach new dogs, old tricks? It seems these days if you want to show something out of the ordinary in your film or video project, the default option is to composite, green screen, photoshop, or fix and create images in post, on a computer, in a digital realm. But before the days of instant-gratification cameras and super fast, powerful and affordable computers, a lot of special effects had to be created “in-camera”, meaning they were accomplished with lighting, optics and physics, which are the key elements in creating forced perspective images. In this article I’ll go over some history of the technique and show you how I used it recently.
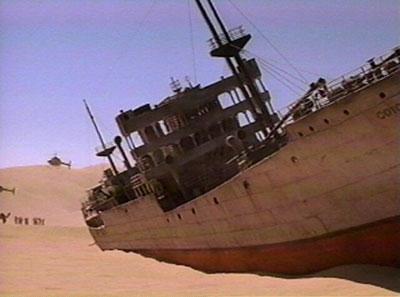
Forced perspective is the effect of making images look smaller, larger, closer or farther away in comparision to another object in the frame. The most recognizable example of this is a photo of someone who appears to be holding up the Leaning Tower of Pisa. A more cinematic example of forced perspective would be making a full sized actor look much smaller, ie, like a Hobbit in Lord of The Rings. Steven Spielberg even employed the technique in Close Encounters.

So why bother if we can just do it in post? There are argueably many reasons for and against, but the most overwhelming reason to create forced perspective shots in-camera is simply that they look better. Case in point: Peter Jackson had a sizeable budget and the digital magicians from WETA at his disposal and still chose to employ forced perspective shots in LOTR to make hobbits and dwarves look smaller than their human companions. From a producers’ standpoint, forced perspective may end up saving production money in the long run by cutting down on production and post-production time and teams of compositing artists. Image how much the shot of the ship in Close Encounters would have cost if it were a real ship transported to the desert, or something composited in post, as opposed to just placing a small model in front of the camera
The Golden Age of Forced Perspective
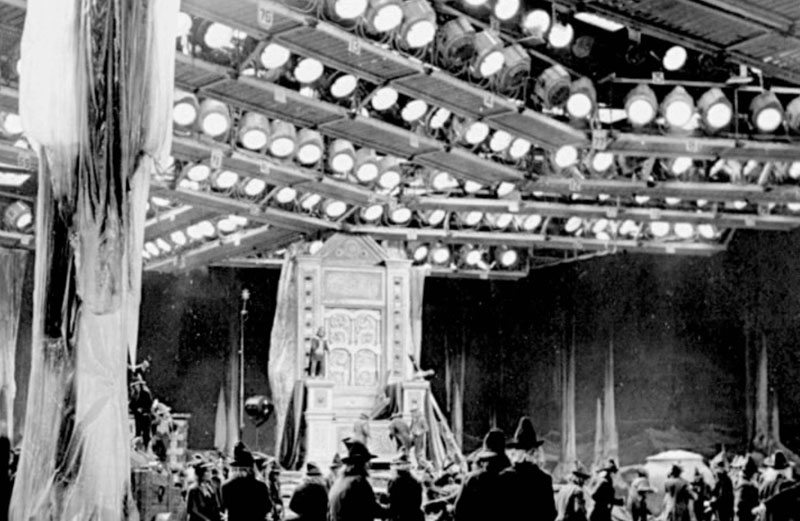
Forced perspective is an optical illusion which manipulates human visual perception through the use of scaled objects and the correlation between them and the vantage point of the audience. Typically, objects closer to the camera will look larger than objects of the same size that are placed farther from the camera. A great example of this is the 1959 Walt Disney film Darby O’Gill and the Little People which made extensive use of forced perspective to tell the story of a wiley old caretaker who starts a battle of wits with leprechauns. The technique was not new in 1959 but Disney’s crack team of craftsmen pioneered new methods to manipulate the audiences’ view and create a world where it appeared that a man was walking among and interacting with leprechauns one-fourth his size.
In the first clip it looks as if Darby seamlessy walks into a cave filled with little people. In fact he is walking on a platform that is higher and closer to camera than the actors playing the little people. The art department carefully painted the floors of both the platform, and cave to match as if they were one floor. This is done to near perfection, but there are a couple of very subtle signs that give it away–you will have to look very closely for them. In the first part of this clip, there is a rock to Darby’s right and as he passes it, his shadow does not fall across it as you would expect.
The second part of the clip has Darby walking across the lip of the platform and here again his shadow gives away the edge of the platform. Notice the foreground leprechauns which are actually small dolls being maniputed by puppeteers.
In this second clip Darby has a drink with the leprechaun king and it is so masterfully done that it seems inconcievable that the king is actually 4 times the distance away from camera than Darby (thereby making him look one quarter scale). The lighting and eyelines are perfect, the set matches seamlessy, the only give away again is a shadow. Notice when Darby pours the drink and the shadow of the jug doesn’t continue on the wall the way it should, revealing the seam where the two set walls are on different planes.
Though the techniques used in filming Darby O’Gill were revolutionary, the camera had to remain static and could not dolly as that movement would cause an alignment shift between foreground and background that would obviously reveal the illusion. Imagine what could be done had they been working with faster film or digital cameras, modern lighting technology and portable, powerful computers. Peter Jackson did when he made Lord Of The Rings. He wanted to shoot forced perspective to create the illusion of Hobbits and wanted to move the camera around, so his team of filmmakers developed complex rigs that would move parts of the set in a precise motion to the camera dolly.
In this clip from Lord Of The Rings, the table is cut in half just past the teapot with the back piece made smaller and slightly lower than the foreground table half, making it look as though Elijah Wood, who plays Frodo, is much smaller than Ian McKellan playing Gandalf. As the camera dollies left, the foreground half of the table and Gandalf shift in sync with it, thereby keeping the perspective and the illusion perfect.
So how does it work?
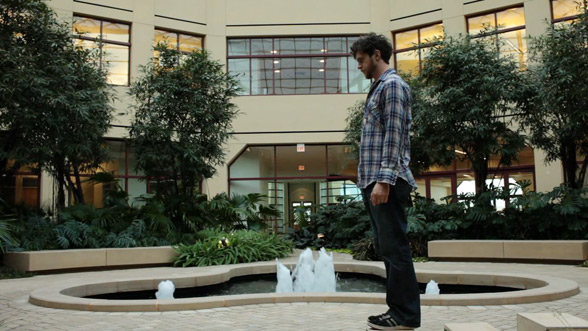
[dc]N[/dc]ot long a go I was shooting a project for Moto Media in Chicago and the script called for a bit where the main character met a smaller, Yoda-like version of himself and we decided that shooting it using the forced perspective technique was going to give us a better result than shooting on a green screen and compositing it. We accomplished this by locking the camera off and shooting two versions of the actor, a small version with him farther from the camera and a large version with him placed closer to the camera. In post we would simply layer the shot and crop out half of the top layer. Here’s how we did it:
First we composed the shot and placed the actor with two positions for the two larger and smaller versions of himself, and gave him eyelines looking straight ahead so that it appeared as though he was looking at himself.

At this point it was important to lock the camera off using a sturdy tripod (dollies work very well for this too), grip equipment and sandbags. This is important because you don’t want any movement in the camera once the process starts otherwise the two shots will not lineup correctly. If you planned properly for this shot, you would have some type of remote start for the camera also which eliminates any need to touch the camera at all until the sequence is finished.

Notice the apple boxes on the bottom right side of the screen. These were meant for the actor to walk on so that his feet look as though they are on the same plane as the small version of himself. The apple boxes will be removed in post. More on that a little later.
Now… Focus!
[dc]I[/dc]n reality, if both characters where truly of a different size and were standing the same distance from the camera, they would both be in sharp focus. Therefore, they both have to be in focus when they are different distances from the camera for the illusion to work, and you wouldn’t want to rack the focus while shooting the sequence because it will change the focus on the background and foreground making it impossible to seamlessly composite the shots. You will have to have enough depth of field to carry both versions of your character. If you are reading this you likely know all the ways to manipulate depth of field (if not, check out this wiki first). So get out your Kelly Wheel or any iPhone DOF app, measure the distances and make sure you can hold focus on all the characters.

[dc]B[/dc]ack in the present day, with our camera locked off, f-stop and focus set, we were ready to film our characters. For this article I am showing just our test footage, our main character was actually lit with fill lights in the shot–these would of course not be in the final composite because they were set in the part of the frame that would be replaced. We shot the actor from one side, and then had him move to the other marks and shot the other version of him. And we are finished, right? Not so fast, remember the part were we were going to remove the apple boxes in post? For that we need to shoot an empty plate. We still haven’t touched the camera, so everything in the shot will still line up when we need it to. For the plate shot, the actor left the set and we removed anything from within the frame that didn’t belong, such as the apple boxes and any lights. You just need to shoot a few seconds of the empty plate.
Import the clips into your favorite editing or compositing program, aligning the timing the way you want it and then simply crop out half of the top layer. It may help to add a soft edge to the crop, but since we had the camera locked down solid, the match is pretty seamless. Now you can lay your clean plate under the shot with the apple boxes and use simple masking techniques to remove them from your shot.
Voila! Our character is having a conversation with himself, twice his size.
One final note on the subject: Forced perspective only works in 2D as it is the single lens, not being able to decipher depth, that allows the illusion to work. As 3D technology and cameras gain in popularity, it is important to understand this and realize you won’t be able to pull off this trick in your upcoming 3D project.
Feel free to share your own examples of forced perspective or any films that you liked which used the technique. Find out more about the forced perspective technique and how it was used in these and other great films:
The Wikipedia article on forced perspective
See the behind-the-scenes mini doc on FP in Darby O’Gill
Observations on film art.

