by Jeff Gatesman
I have shot a feature film called No Ordinary Hero with the new Canon 5D Mk III using the clean video output to an Atomos Ninja 2 and recording to ProRes 422 Hq. This was a conscious choice for several reasons, the main one being that we have a dozen or so FX shots, mostly green screen composites and we needed the fattest “negative” our low-budget film could afford.
I will get to the meat of the subject with camera setup and recorder settings in a moment but first let me start by addressing the fat “negative” statement (and unless you are going straight from your camera output to a finished product you need to be thinking of the files as a camera negative, or at least a starting point for your final look) because when Canon came out with the firmware update on April 30 that allowed for clean video out via HDMI on the 5D Mk III, I read a few posts where people visually compared the h.264 video from the camera to the 422 video recorded by the Ninja. The conclusion that there was no discernible difference visually between the files is as expected–the codecs were doing their job, compressing and decompressing the file so that in the end they look like HD video. This is not the point of recording 422 Hq over h.264. The reason for recording the raw video to 422 Hq is to get as much information as possible for the post workflow in order to be able to cut keys easily, and color time the final film without the degradation that begins with a lossy codec like h.264.
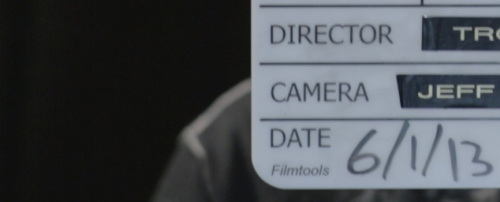
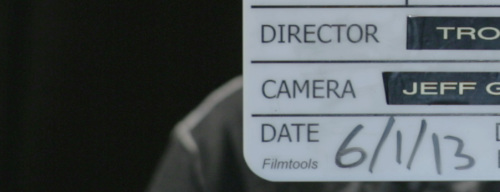
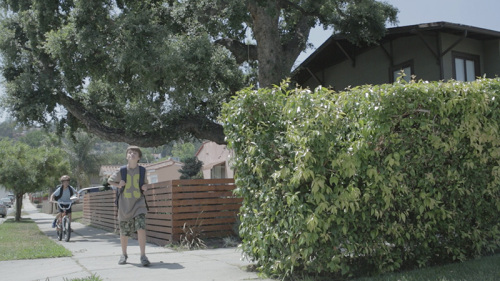
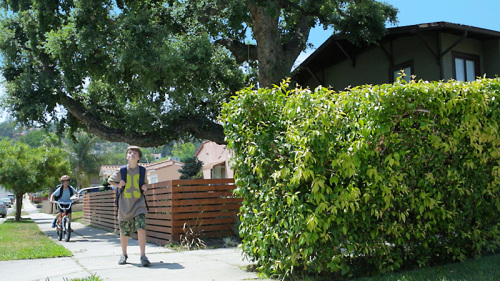
If you compare the two codecs you can easily see the difference: h.264 is an 8-bit codec using 4:2:0 chroma subsampling, and the Ninja 2 records Pro Res 422 Hq at 10 bits using 4:2:2 chroma subsampling. A simplified comparison is that the identical files as recorded from the 5D Mk III on cf card vs the Ninja 2 weigh in at 129 MB vs 863 MB respectively. That is almost 7 times as much information in the Pro Res files. In order to make the files so miniscule, the h.264 codec has to throw away valuable information during the compression process and rely on interpolation to recreate it during decompression. You can see the effects of a lossy codec by viewing the frame grabs below, taken from the actual footage from No Ordinary Hero and cropped at 100%.


Notice how much sharper and higher contrast the image from Pro Res looks.
Hardware Setup
That was the why, this is the how. Atomos was kind enough to create a page with step by step instructions on how to set up the Canon 5D Mk III here, but I have found one of their steps misleading. When you get to step 5- Set HDMI frame-rate, they suggest using the Auto setting. I disagree as I had a problem with the Ninja 2 recording an interlaced signal when it should have been recording 24p. The solution was to simply set the HDMI frame-rate to the same output you are recording (24p if you are recording 24 frames, and 60i if you are recoding 30 fps). If you frequently change between 24 and 30 fps, register both HDMI frame rate and Movie Rec Size to the My Menu Settings page on the 5D MkIII for quick and easy access.
Connection to the Ninja 2 is via an HDMI cable. This is not an ideal situation for film production as HDMI tends to be a bit fussy, so at the very least, it is a good idea to have several extra cables on hand. I found that the Rocket fish Ultra Thin cables are very good as they use a thin gauge cable that is very pliable. The heavier gauge stuff is just that: heavy and stiff, so it doesn’t want to go the way you always want it to, and any little bump will cause a break in the signal to the recorder. The Ninja 2 uses a buffer and has responded pretty nicely to this and continues recording after it re-acquires the signal, but you still have a take that is now in 2 clips with a couple of seconds missing and basically you will need another take.
Also, Canon does not send audio out of the HDMI port, so if you want to capture audio from the camera to the Ninja, you will need a short stereo mini cable from the headphone out on your camera to the audio in on the Ninja 2.
I shot the film using Technicolor’s Cinestyle color profile which gave me a fairly flat, unsaturated file, but it also seemed to add almost a stop of dynamic range, which is important as the 5D Mk III has a very limited range to begin with. Because of that limited range, I was very careful in my lighting ratios, keeping the key and fill lights only about a stop and a half apart. This helped to give me a nice, even look while maintaining some pretty definition.
It’s not perfect, but this is a great setup for shooting an ultra low-budget film, and you will get excellent results in the end by recording to 422Hq. Here is a screen shot of a clip as shot using the Technicolor Cinestyle color profile, and the same shot color graded.


Ultimately, you can get excellent results and not only save money in the production phase by shooting with the 5D Mk III and Ninja 2, you will also see savings in post by creating files that are manageable as far as transfer and storage of dailies, speed in getting the files directly into an editing pipeline without transcoding, or the need for extremely expensive video cards and mass storage.
The Complete camera package included Zeiss ZE prime lenses: 35mm; 50mm; 85mm; and the 135 APO Sonnar.


It’s a bit late commenting on this, but its an excellent idea getting an external recorder. Especially now with Ninja blade (screen that can be used as a reliable monitor).
Will be making a few shorts soon – Should look amazing.
My understanding is that the headphones out on the 5D MIII does not have the noise reduction circuit that the sound going into the files has so that is not an ideal solution. I think that is a major drawback that I did not expect. My experiments suggest that it is less likely to overload and so one could record a little louder to get over the noise level but I’d have to experiment further
Thanks for your insightful comment Doug, I was not aware that noise reduction was not applied to the headphone circuit on the 5D MkIII. I probably should have mentioned it, though the piece was meant as an opinion on image quality, that I recorded sound to the Ninja primarily as a reference track and that I believe the best situation is to record sound separately whenever feasible. I agree with you that sound recording on the 5D MkIII, and likely any DSLR, is less than optimal: in addition to what you said about the lack of noise reduction, the in-camera mic is not designed to pickup any kind of directional sound, and the external mic inputs are unbalanced. During the filming of No Ordinary Hero we did record sound separately, utilizing a sound person who recorded to a high end device (in our case, I believe it was a Sound Devices field recorder). We used a slate for purposes of syncing the sound in post, but the reference track recorded to the Ninja quite possibly made that task much easier for the editor.
Great article. FYI your link to the Atomos setup page for 5DM3 no longer exists.
Also when you say you shot using Technicolor’s Cinestyle color profile where is that setting? in the Canon or in the Atomos? I can’t seem to find any settings like that in either device.
Thanks!
Thanks Keir. The TechniColor CineStyle profile is a 3rd party add on you install onto the camera. You can download it here.